Learning how to program an Arduino opens up a universe of possibilities, from building interactive art installations to creating your own smart home devices. For those new to electronics and coding, the initial steps can seem intimidating. However, with its simple hardware, user-friendly software, and a massive global community, Arduino is one of the most accessible platforms for diving into the world of microcontrollers. This comprehensive guide is designed to demystify the process and show you exactly how to learn Arduino programming for beginners, breaking down the journey into manageable, easy-to-understand steps.
Daftar Isi
- 1 What is Arduino and Why Should You Learn It?
- 2 Your First Steps: How to Study Arduino Programming
- 3 The “Blink” Sketch: Your “Hello, World!”
- 4 How to Learn Arduino Programming Free: Top Resources
- 5 How to Learn Arduino Programming Code Language
- 6 How to Master Arduino: Moving from Beginner to Pro
- 7 Your Journey Begins Now
What is Arduino and Why Should You Learn It?

Before diving into the code, it’s essential to understand what Arduino is. At its core, Arduino is an open-source electronics platform based on easy-to-use hardware and software.
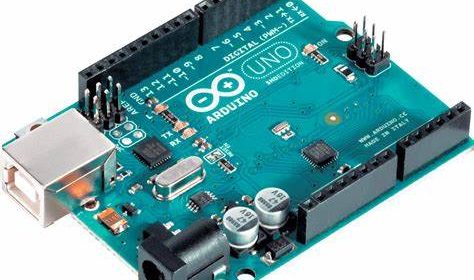
- The Hardware: This is the physical Arduino board, a microcontroller that can be programmed to read inputs (like a light on a sensor or a button press) and turn it into an output (like activating a motor, turning on an LED, or publishing something online). The Arduino Uno is the most popular and recommended board for beginners.
- The Software: This is the Arduino IDE (Integrated Development Environment), a free application that runs on your computer (Windows, Mac, or Linux) where you write and upload code to your physical Arduino board.
So, why invest your time? The benefits are numerous:
- Affordability: Arduino boards and components are relatively inexpensive, making it a low-cost entry point into electronics.
- Simplicity: The programming language is a simplified version of C++, making it easier to grasp than more complex languages.
- Vast Community: If you encounter a problem, chances are someone else has too. The massive community on forums, YouTube, and blogs provides endless support and project inspiration.
- Versatility: The skills you learn can be applied to countless fields, including robotics, IoT (Internet of Things), wearable technology, and automated systems.
Your First Steps: How to Study Arduino Programming
A structured approach is the best way to avoid feeling overwhelmed. If you want to effectively study Arduino programming, follow this clear path from unboxing your first kit to running your first program.
Step 1: Gather Your Essential Toolkit
You don’t need a full-fledged electronics lab to start. Here is the bare minimum you’ll need:
- An Arduino Board: The Arduino Uno R3 is the perfect starting point due to its robustness and extensive documentation.
- A USB Cable: This is used to connect your Arduino board to your computer for both power and uploading code. It usually comes with the board.
- A Computer: Any modern Mac, Windows, or Linux PC will work.
- An Arduino Starter Kit: While you can buy components individually, a starter kit is the most cost-effective and convenient option. It typically includes a breadboard, jumper wires, LEDs, resistors, buttons, and various sensors to get you started on multiple projects.
Step 2: Install the Arduino IDE
The Arduino IDE is your command center.
- Go to the official Arduino Software page.
- Download the version appropriate for your operating system.
- Install the software by following the on-screen instructions.
- Once installed, open the application. You will be greeted by a clean, simple interface with two main functions:
void setup()andvoid loop(). We will cover these later.
Step 3: Connect and Configure
Now, let’s get your computer and Arduino talking to each other.
- Plug your Arduino board into your computer using the USB cable. A small green power LED on the board should light up.
- In the Arduino IDE, go to Tools > Board and select the type of board you are using (e.g., “Arduino Uno”).
- Next, go to Tools > Port and select the serial port your Arduino is connected to. It will usually be labeled with “(Arduino Uno)”.
The “Blink” Sketch: Your “Hello, World!”
In programming, the first program you write is traditionally “Hello, World!”. In the Arduino world, the equivalent is “Blink”—a simple program that makes an onboard LED blink on and off. This is the perfect first project to confirm everything is working correctly.
- In the Arduino IDE, go to File > Examples > 01.Basics > Blink. This will load the pre-written Blink sketch.
- Click the Upload button (the right-pointing arrow icon) in the top-left corner of the IDE.
- After a few seconds, you should see the small “L” LED on your Arduino board start to blink—one second on, one second off.
Congratulations! You have successfully programmed an Arduino for the first time.
How to Learn Arduino Programming Free: Top Resources
The journey has just begun, and you don’t need to spend a fortune to continue it. One of the best aspects of the platform is the abundance of free learning materials. Knowing how to learn Arduino programming free is about leveraging the community’s generosity.
- The Official Arduino Website: The official site has excellent tutorials, a wealth of project examples, and a comprehensive reference page that explains every function and library.
- YouTube: Channels dedicated to electronics and DIY projects are invaluable. Look for creators who offer step-by-step project builds for beginners.
- Instructables and Hackster.io: These are project-sharing websites where creators post detailed instructions, schematics, and code for thousands of Arduino projects. You can learn by recreating their work.
- Arduino Forums: The official Arduino Forum and other communities like Reddit’s r/arduino are places where you can ask questions and get help from experienced users.
How to Learn Arduino Programming Code Language
To move beyond the basic examples, you need to understand the language itself. To learn Arduino programming code language, you must familiarize yourself with its structure, which is based on C/C++. Don’t let that scare you; Arduino simplifies it significantly.
Every Arduino program, called a “sketch,” has two essential parts:
void setup() ...: This function runs only once when the Arduino is powered on or reset. You use it for initial configurations, like setting pin modes or starting a serial communication.void loop() ...: As the name suggests, the code inside this function runs over and over again in a loop, as long as the board has power. This is where the main logic of your program resides.
Core Concepts of the Arduino Language
Here are the fundamental building blocks you will encounter in almost every sketch. The official documentation serves as the ultimate arduino programming guide for these concepts.
- Functions: These are blocks of code that perform a specific task, like
pinMode(),digitalWrite(), anddelay().pinMode(pin, mode): Configures a specific pin to behave as either anINPUTor anOUTPUT.digitalWrite(pin, value): Writes aHIGH(on) orLOW(off) value to a digital pin.delay(ms): Pauses the program for a specified number of milliseconds.
- Variables: These are containers for storing data. You must declare a variable’s type, such as
intfor integers,floatfor decimal numbers, andcharfor characters. - Control Structures: These allow you to control the flow of your program.
if...elsestatements: Perform a check and execute code based on whether the condition is true or false.forloops: Repeat a block of code a specific number of times.whileloops: Repeat a block of code as long as a condition remains true.
For a deep dive into every command, the official reference page is the definitive arduino language guide. Bookmark it and refer to it often.
How to Master Arduino: Moving from Beginner to Pro
Blinking an LED is just the start. The path to proficiency is paved with practice, curiosity, and project-based learning. If your goal is to learn how to master Arduino, you need to go beyond tutorials and start creating.
1. Build, Build, Build
The single most effective way to learn is by doing. Don’t just read about sensors; buy one and write the code to get a reading from it. Start with simple projects from a starter kit and gradually increase the complexity.
- Beginner Projects: Fading an LED with
analogWrite(), reading a button press, controlling a servo motor. - Intermediate Projects: Building a simple robot, creating a temperature and humidity display, making a distance sensor alarm.
- Advanced Projects: Designing an IoT weather station that posts data online, building a GPS tracker, or creating a home automation system.
2. Learn to Read Schematics
Code is only half the battle. You need to understand how to connect the hardware. Learning to read basic circuit diagrams (schematics) will empower you to build any project you find online, not just those with step-by-step pictures.
3. Understand the Electronics
You don’t need an electrical engineering degree, but learning basic concepts will make you a much better programmer. Understand what resistors do, the difference between analog and digital signals, and how to use a breadboard effectively. This knowledge is crucial for debugging hardware issues.
4. Embrace Debugging
Your code will not work on the first try. This is a normal part of programming. Learn to use the Serial Monitor in the Arduino IDE. It’s an invaluable tool that allows your Arduino to send messages and data back to your computer, helping you see what’s happening inside your program and pinpoint errors.
5. Read Other People’s Code
Explore projects on GitHub or Instructables. Reading code written by more experienced developers is a fantastic way to learn new techniques, discover useful libraries, and understand more efficient ways to solve problems.
Your Journey Begins Now
Learning how to program an Arduino is a rewarding skill that blends creativity with logic. By starting with the basics, utilizing the wealth of free resources, and consistently challenging yourself with new projects, you can go from a complete novice to a confident creator. The key is to stay curious, be persistent when you face challenges, and remember that every complex project is just a series of simple steps. Your adventure into the exciting world of electronics and programming starts today.